React native has recently launched its new version 5.x with major changes. React navigation is used in react native apps to add and manage multiple screens. We can easily add multiple activities in our react native project using react navigation. React Navigation has changed its way of installation. Now we have to make some changes in Android’s default files. So in this tutorial we would learn about React Navigation Latest Version 5.x in React Native Android iOS Example Tutorial.
Contents in this project React Navigation Latest Version 5.x in React Native Example Tutorial:
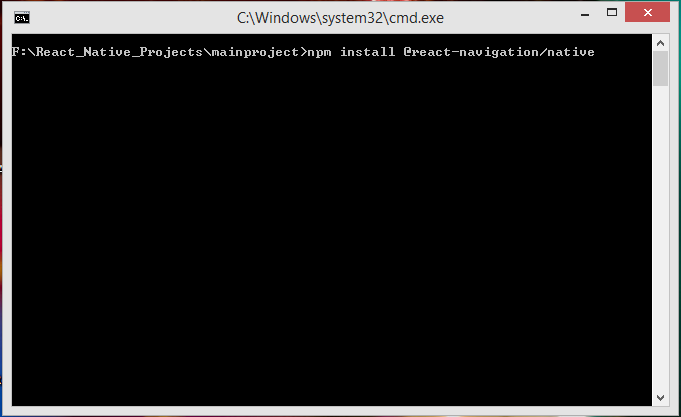
1. The first step is to install the latest version of React Navigation library in our react native project. So open your react native project root folder directory in Command Prompt and execute below command.
|
1
|
npm install @react–navigation/native
|
Screenshot of CMD:
Screenshot of CMD after done installation:
 2. Now we have to install reanimated, gesture handler, react native screens, react native safe area and masked view component in our react native project. So again open your react native root project folder in Command Prompt and execute below command. These libraries are compulsory for react navigation.
|
1
|
npm install react–native–reanimated react–native–gesture–handler react–native–screens react–native–safe–area–context @react–native–community/masked–view
|
Screenshot of CMD: Screenshot of CMD after done installation:
 3. Next step is to install the Stack Navigator library in your react native project. Because the libraries we have installed so fare is used to build blocks and shared foundation for navigator. Execute below command again in your Root directory of your react native project in Command Prompt or Terminal.
|
1
|
npm install @react–navigation/stack
|
Screenshot of CMD: Screenshot after done installation:
 4. Now your project is ready to go with new 5.x version of React Navigation. Next part is start coding for app. So open your project’s App.js file. Import react-native-gesture-handler at top of your code. If we do not import react-native-gesture-handler then it will not show us an error in debug mode but surely give error in original complete APK mode.
|
1
|
import ‘react-native-gesture-handler’;
|
5. Import StyleSheet, Text, View and Button component in your project.
|
1
2
3
|
import * as React from ‘react’;
import { StyleSheet, Text, View, Button } from ‘react-native’;
|
6. NavigationContainer and createStackNavigator component from react navigation library.
|
1
2
3
|
import { NavigationContainer } from ‘@react-navigation/native’;
import { createStackNavigator } from ‘@react-navigation/stack’;
|
7. Create a function with function keyword named as HomeScreen with navigation prop. This is our first home screen. In latest version of react navigation they improves the structure of app coding. So this way we can easily make Views in react navigation.
- navigateToScreen : Function is used to navigate to next screen on button onPress event in react navigation 5.x.
|
1
2
3
4
5
6
7
8
9
10
11
12
13
14
15
16
17
18
|
function HomeScreen({ navigation }) {
navigateToScreen=()=>{
navigation.navigate(‘Second’);
}
return (
<View style={styles.MainContainer}>
<Text style={styles.text}> Home Screen </Text>
<Button onPress={this.navigateToScreen} title=“Navigate To Second Screen” />
</View>
);
}
|
Screenshot of Home Screen:
 8. Create another function class named as SecondScreen. This would be our Second activity screen of app.
|
1
2
3
4
5
6
7
8
9
|
function SecondScreen() {
return (
<View style={styles.MainContainer}>
<Text style={styles.text}> Second Screen </Text>
</View>
);
}
|
Screenshot of Second Screen:
 9. Create a Constant createStackNavigator() named as Stack.
|
1
|
const Stack = createStackNavigator();
|
10. Create a function named as App and put Stack.Screen with Screens names and wrap them in Stack.Navigator. We have to also wrap the Stack.Navigator in Navigation Container component. Navigation Container component holds the navigation state for all given child components classes.
|
1
2
3
4
5
6
7
8
9
10
11
12
13
|
function App() {
return (
<NavigationContainer>
<Stack.Navigator>
<Stack.Screen name=“Home” component={HomeScreen} />
<Stack.Screen name=“Second” component={SecondScreen} />
</Stack.Navigator>
</NavigationContainer>
);
}
|
11. Creating Style.
|
1
2
3
4
5
6
7
8
9
10
11
12
13
14
15
|
const styles = StyleSheet.create({
MainContainer: {
flex: 1,
justifyContent: ‘center’,
alignItems: ‘center’
},
text: {
textAlign: ‘center’,
margin: 12,
fontSize: 22,
fontWeight: “100”,
},
});
|
12. Call our main export default syntax then we have to call the App function here, Which would automatically render all the views.
|
1
|
export default App;
|
13. Complete Source Code for App.js file class:
|
1
2
3
4
5
6
7
8
9
10
11
12
13
14
15
16
17
18
19
20
21
22
23
24
25
26
27
28
29
30
31
32
33
34
35
36
37
38
39
40
41
42
43
44
45
46
47
48
49
50
51
52
53
54
55
56
57
58
59
60
61
62
63
64
65
66
67
68
69
70
71
72
|
import ‘react-native-gesture-handler’;
import * as React from ‘react’;
import { StyleSheet, Text, View, Button } from ‘react-native’;
import { NavigationContainer } from ‘@react-navigation/native’;
import { createStackNavigator } from ‘@react-navigation/stack’;
function HomeScreen({ navigation }) {
navigateToScreen=()=>{
navigation.navigate(‘Second’);
}
return (
<View style={styles.MainContainer}>
<Text style={styles.text}> Home Screen </Text>
<Button onPress={this.navigateToScreen} title=“Navigate To Second Screen” />
</View>
);
}
function SecondScreen() {
return (
<View style={styles.MainContainer}>
<Text style={styles.text}> Second Screen </Text>
</View>
);
}
const Stack = createStackNavigator();
function App() {
return (
<NavigationContainer>
<Stack.Navigator>
<Stack.Screen name=“Home” component={HomeScreen} />
<Stack.Screen name=“Second” component={SecondScreen} />
</Stack.Navigator>
</NavigationContainer>
);
}
const styles = StyleSheet.create({
MainContainer: {
flex: 1,
justifyContent: ‘center’,
alignItems: ‘center’
},
text: {
textAlign: ‘center’,
margin: 12,
fontSize: 22,
fontWeight: “100”,
},
});
export default App;
|
Screenshots: