In our previous tutorial we had discussed about React navigation latest version 5.x. In this tutorial we wold learn about managing large scale react native applications using custom Modules structure. Using custom modules we can easily manage multiple react native app files by separating them. As we all know in every android or iOS application there are many screens, function classes. We cannot put them into single main App.js file so using separate modules we can mange the complete react native project easily. So in this tutorial we would learn about React Navigation 5.x Call External JS Screen Files in App.js File React Native Android iOS example tutorial.
Contents in this project React Navigation 5.x Call External JS Screen Files in App.js File React Native Android iOS Example Tutorial:
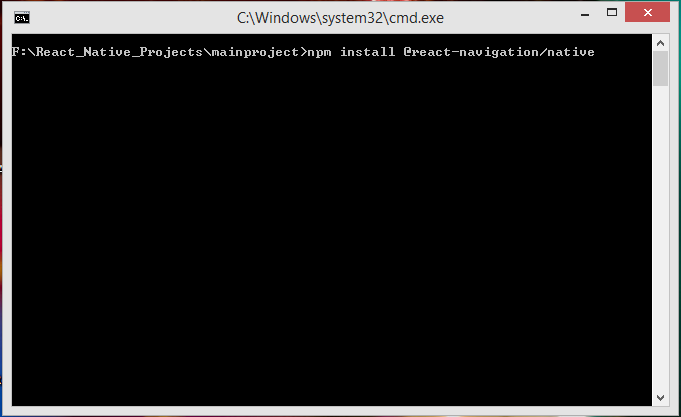
1. Before getting started understanding modules, We have to install the latest version of React Navigation in our current project. So open your react native project root folder in Command Prompt or Terminal and execute below command to install React Navigation latest version.
|
1
|
npm install @react–navigation/native
|
Screenshot of Command Prompt :

Screenshot of Command Prompt after finish installation:

2. Next thing to install reanimated, gesture handler, react native screens, react native safe area and masked view components libraries in our react native project. So again open your react native project root folder in Command Prompt and execute below command.
|
1
|
npm install react–native–reanimated react–native–gesture–handler react–native–screens react–native–safe–area–context @react–native–community/masked–view
|
Screenshot of Command Prompt:

Screenshot after done installation:

3. Now we have to install Stack Navigator library in our react native project. Using stack navigator we can manage multiple screens easily.
|
1
|
npm install @react–navigation/stack
|
Screenshot of CMD:

Screenshot on finish installation:

4. Now we have to open our react native project folder. In my case my react native project name is Project. So open you react native project and make a folder named as modules inside your react native project folder root directory. We would put our 2 Screen files inside the modules folder.
 5. Now we would make 2 file named as HomeScreen.js and SecondScreen.js . They both files are used to manage individual activity screens.
 6. Open newly created HomeScreen.js file and put below code inside it. This is our Home Screen for application.
- navigateToScreen : Function is used to navigate to next Second screen activity.
|
1
2
3
4
5
6
7
8
9
10
11
12
13
14
15
16
17
18
19
20
21
22
23
24
25
26
27
28
29
30
31
32
33
34
35
36
37
38
39
40
41
42
|
import ‘react-native-gesture-handler’;
import * as React from ‘react’;
import { StyleSheet, Text, View, Button } from ‘react-native’;
function HomeScreen({ navigation }) {
navigateToScreen=()=>{
navigation.navigate(‘Second’);
}
return (
<View style={styles.MainContainer}>
<Text style={styles.text}> Home Screen </Text>
<Button onPress={this.navigateToScreen} title=“Navigate To Second Screen” />
</View>
);
}
const styles = StyleSheet.create({
MainContainer: {
flex: 1,
justifyContent: ‘center’,
alignItems: ‘center’
},
text: {
textAlign: ‘center’,
margin: 18,
fontSize: 24,
fontWeight: “200”,
},
});
export default HomeScreen ;
|
Screenshot of Home screen:
 7. Open SecondScreen.js file and paste below code inside it. This is our Second screen of application.
|
1
2
3
4
5
6
7
8
9
10
11
12
13
14
15
16
17
18
19
20
21
22
23
24
25
26
27
28
29
30
31
32
|
import ‘react-native-gesture-handler’;
import * as React from ‘react’;
import { StyleSheet, Text, View } from ‘react-native’;
function SecondScreen() {
return (
<View style={styles.MainContainer}>
<Text style={styles.text}> Second Screen </Text>
</View>
);
}
const styles = StyleSheet.create({
MainContainer: {
flex: 1,
justifyContent: ‘center’,
alignItems: ‘center’
},
text: {
textAlign: ‘center’,
fontSize: 24,
fontWeight: “200”,
},
});
export default SecondScreen ;
|
Screenshot of Second Screen:
 8. Next and main step is open your project’s main App.js file and import react-native-gesture-handler, NavigationContainer and createStackNavigator component.
|
1
2
3
4
5
6
7
|
import ‘react-native-gesture-handler’;
import * as React from ‘react’;
import { NavigationContainer } from ‘@react-navigation/native’;
import { createStackNavigator } from ‘@react-navigation/stack’;
|
9. Now we have to import HomeScreen and SecondScreen from modules folder into our App.js file.
|
1
2
3
|
import HomeScreen from ‘./modules/HomeScreen’;
import SecondScreen from ‘./modules/SecondScreen’;
|
10. Create a Constant createStackNavigator named as Stack.
|
1
|
const Stack = createStackNavigator();
|
11. Create a main function named as App(). Inside this function we would first return the NavigationContainer than call both screens using Stack.Screen .
|
1
2
3
4
5
6
7
8
9
10
11
12
13
|
function App() {
return (
<NavigationContainer>
<Stack.Navigator>
<Stack.Screen name=“Home” component={HomeScreen} />
<Stack.Screen name=“Second” component={SecondScreen} />
</Stack.Navigator>
</NavigationContainer>
);
}
|
12. Now on the final step we have to call our main App() function using export default. So the app know this is the function which will be executed first.
|
1
|
export default App;
|
13. Complete Source Code for App.js file class:
|
1
2
3
4
5
6
7
8
9
10
11
12
13
14
15
16
17
18
19
20
21
22
23
24
25
26
27
28
29
|
import ‘react-native-gesture-handler’;
import * as React from ‘react’;
import { NavigationContainer } from ‘@react-navigation/native’;
import { createStackNavigator } from ‘@react-navigation/stack’;
import HomeScreen from ‘./modules/HomeScreen’;
import SecondScreen from ‘./modules/SecondScreen’;
const Stack = createStackNavigator();
function App() {
return (
<NavigationContainer>
<Stack.Navigator>
<Stack.Screen name=“Home” component={HomeScreen} />
<Stack.Screen name=“Second” component={SecondScreen} />
</Stack.Navigator>
</NavigationContainer>
);
}
export default App;
|
Screenshots:


