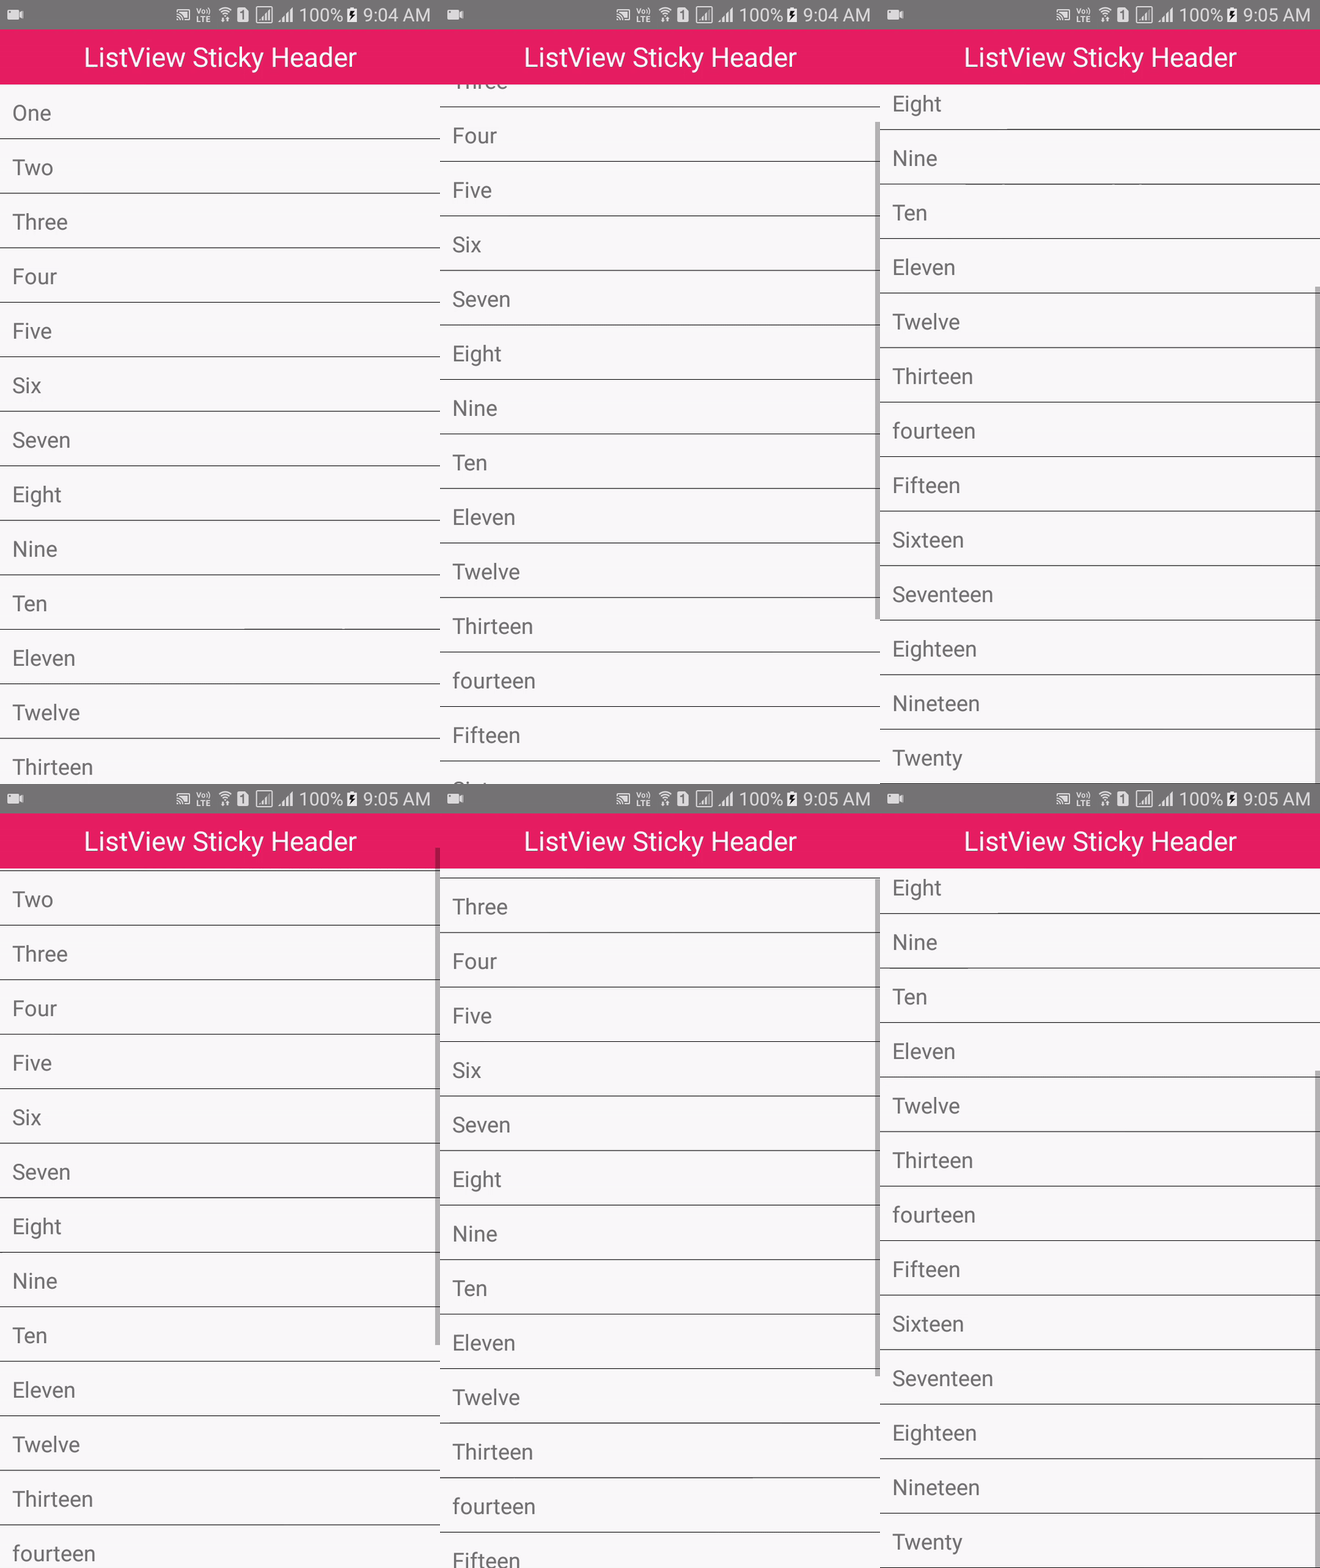
In our previous tutorial we have implement sticky header on FlatList but in this tutorial we would going Add Sticky Header to ListView for both android and iOS devices. ListView is the oldest component present in react native since its been developed so most of the peoples used ListView and faced a problem to place Sticky header above it. Sticky header is a fixed header shows just above at the top of ListView and dose not move while user scrolls the ListView, it will stuck there. So in this tutorial we would going to Add Sticky Header to ListView in react native Android iOS Example tutorial. You can also make sticky ListView sections using this tutorial.
Live Screenshot:
ListView props used in this tutorial to make header Sticky:
renderHeader : This prop would allow us to set Header on ListView and its by default index value is 0(zero).
stickyHeaderIndices={[0]} : This would make the header as sticky because its automatically placed at 0th number of index.
Contents in this project Add Sticky Header to ListView in Android iOS React Native App Example:
1. Import StyleSheet, Text, View, Alert and ListView component in your project.
|
1
2
3
|
import React, { Component } from ‘react’;
import { StyleSheet, Text, View, Alert, ListView} from ‘react-native’;
|
2. Create constructor() in your class and we would make the ListView data source and add 1 to 20 number of items inside data source. These items would show inside ListView.
|
1
2
3
4
5
6
7
8
9
10
11
12
13
14
15
16
17
18
19
20
21
22
23
24
25
26
27
28
29
30
31
32
33
34
35
36
|
constructor(props) {
super(props);
const ds = new ListView.DataSource({rowHasChanged: (r1, r2) => r1 !== r2});
this.state = {
dataSource: ds.cloneWithRows([
‘One’,
‘Two’,
‘Three’,
‘Four’,
‘Five’,
‘Six’,
‘Seven’,
‘Eight’,
‘Nine’,
‘Ten’,
‘Eleven’,
‘Twelve’,
‘Thirteen’,
‘fourteen’,
‘Fifteen’,
‘Sixteen’,
‘Seventeen’,
‘Eighteen’,
‘Nineteen’,
‘Twenty’
]),
};
}
|
3. Crate a function named as ListViewItemSeparator(), this function would make a separator line between each ListView elements.
|
1
2
3
4
5
6
7
8
9
10
11
|
ListViewItemSeparator = () => {
return (
<View
style={{
height: .5,
width: “100%”,
backgroundColor: “#000”,
}}
/>
);
}
|
4. Create a function named as GetListViewItem(), this function would call on ListView item onPress event and show us the selected value.
|
1
2
3
4
5
|
GetListViewItem (rowData) {
Alert.alert(rowData);
}
|
5. This step is very important, create a function RenderListViewHeader() to render the header above ListView. We would simply creating a View inside this function and returning it, you can make any view according to your requirement.
|
1
2
3
4
5
6
7
8
9
10
11
12
13
14
15
|
RenderListViewHeader = () => {
var header = (
<View style={styles.header_style}>
<Text style={{textAlign: ‘center’, color: ‘#fff’, fontSize: 22, padding: 7}}> ListView Header </Text>
</View>
);
return header;
};
|
6. Creating ListView component inside root View in render’s return block.
stickyHeaderIndices={[0]} : Makes the header sticky.
renderHeader={this.RenderListViewHeader} : Render the header view above ListView.
|
1
2
3
4
5
6
7
8
9
10
11
12
13
14
15
16
17
18
19
20
21
22
23
24
25
26
27
28
29
|
render() {
return (
<View style={styles.MainContainer}>
<ListView
dataSource={this.state.dataSource}
stickyHeaderIndices={[0]}
renderHeader={this.RenderListViewHeader}
renderSeparator= {this.ListViewItemSeparator}
renderRow={
(rowData) => <Text style={styles.rowViewContainer} onPress={this.GetListViewItem.bind(this, rowData)}>{rowData}</Text>
}
/>
</View>
);
}
|
7. Creating Style.
|
1
2
3
4
5
6
7
8
9
10
11
12
13
14
15
16
17
18
19
20
21
22
23
24
25
26
27
|
const styles = StyleSheet.create({
MainContainer :{
justifyContent: ‘center’,
flex:1,
paddingTop: (Platform.OS == ‘ios’ ? 20 : 0)
},
rowViewContainer:
{
padding: 10,
fontSize: 18,
height: 44,
},
header_style:{
width: ‘100%’,
height: 45,
backgroundColor: ‘#E91E63’
}
});
|
8. Complete source code for App.js File :
|
1
2
3
4
5
6
7
8
9
10
11
12
13
14
15
16
17
18
19
20
21
22
23
24
25
26
27
28
29
30
31
32
33
34
35
36
37
38
39
40
41
42
43
44
45
46
47
48
49
50
51
52
53
54
55
56
57
58
59
60
61
62
63
64
65
66
67
68
69
70
71
72
73
74
75
76
77
78
79
80
81
82
83
84
85
86
87
88
89
90
91
92
93
94
95
96
97
98
99
100
101
102
103
104
105
106
107
108
109
110
111
112
113
114
115
116
117
118
119
120
121
122
123
124
125
126
127
128
129
130
131
132
133
134
135
|
import React, { Component } from ‘react’;
import { StyleSheet, Text, View, Alert, ListView, Platform} from ‘react-native’;
export default class Myproject extends Component {
constructor(props) {
super(props);
const ds = new ListView.DataSource({rowHasChanged: (r1, r2) => r1 !== r2});
this.state = {
dataSource: ds.cloneWithRows([
‘One’,
‘Two’,
‘Three’,
‘Four’,
‘Five’,
‘Six’,
‘Seven’,
‘Eight’,
‘Nine’,
‘Ten’,
‘Eleven’,
‘Twelve’,
‘Thirteen’,
‘fourteen’,
‘Fifteen’,
‘Sixteen’,
‘Seventeen’,
‘Eighteen’,
‘Nineteen’,
‘Twenty’
]),
};
}
ListViewItemSeparator = () => {
return (
<View
style={{
height: .5,
width: “100%”,
backgroundColor: “#000”,
}}
/>
);
}
GetListViewItem (rowData) {
Alert.alert(rowData);
}
RenderListViewHeader = () => {
var header = (
<View style={styles.header_style}>
<Text style={{textAlign: ‘center’, color: ‘#fff’, fontSize: 22, padding: 7}}> ListView Sticky Header </Text>
</View>
);
return header;
};
render() {
return (
<View style={styles.MainContainer}>
<ListView
dataSource={this.state.dataSource}
stickyHeaderIndices={[0]}
renderHeader={this.RenderListViewHeader}
renderSeparator= {this.ListViewItemSeparator}
renderRow={
(rowData) => <Text style={styles.rowViewContainer} onPress={this.GetListViewItem.bind(this, rowData)}>{rowData}</Text>
}
/>
</View>
);
}
}
const styles = StyleSheet.create({
MainContainer :{
justifyContent: ‘center’,
flex:1,
paddingTop: (Platform.OS == ‘ios’ ? 20 : 0)
},
rowViewContainer:
{
padding: 10,
fontSize: 18,
height: 44,
},
header_style:{
width: ‘100%’,
height: 45,
backgroundColor: ‘#E91E63’
}
});
|
Screenshot in Android device:
Screenshot in iOS device:


